
Procure Your Spotify Refresh Token
Preface
Once upon a time, I was using OneGraph which later became Netlify Graph. In any case, it handled the authorization and authentication process behind the scenes. Besides, GraphQL is so much nicer to deal with than REST. The authentication process can be a nuisance, but necessary. Unfortunately, Netlify has dropped Netlify Graph support, and now this simple fetch process just became more complex.
Like most guides, I’m writing this one for myself in case my mind develops dementia.
The following guide outlines a very manual method of obtaining your Spotify application’s REFRESH_TOKEN. By no means is this meant as a “best practices” guide. However, for simple use cases, like building a static site, this workflow might be sufficient enough.
To Boot
Open a new plain text document, or create a .env file within your project.
Add the following variables:
APP_URL
REDIRECT_URI
CLIENT_ID
CLIENT_SECRET
SCOPES
APP_CLIENTS
ACCESS_TOKEN
REFRESH_TOKEN
Most of these variables will be referenced throughout this guide, and several of them might be used in your project. A grand idea is to organize ahead as the process can seem unwieldy.
Create a Spotify App
Log in to the Developers Dashboard
Login Url: Spotify Developers Dashboard
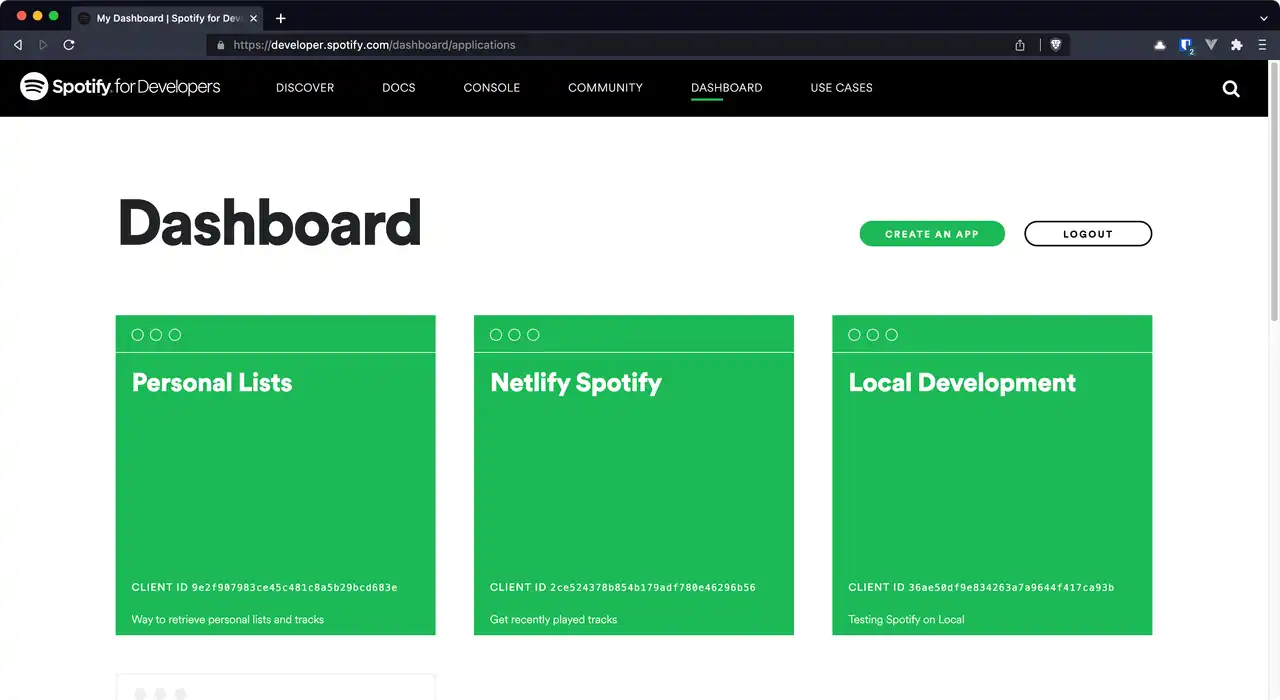
On the Dashboard, press Create an App.
Fill out the applications’s Name and Description, and save.
Edit the App Details
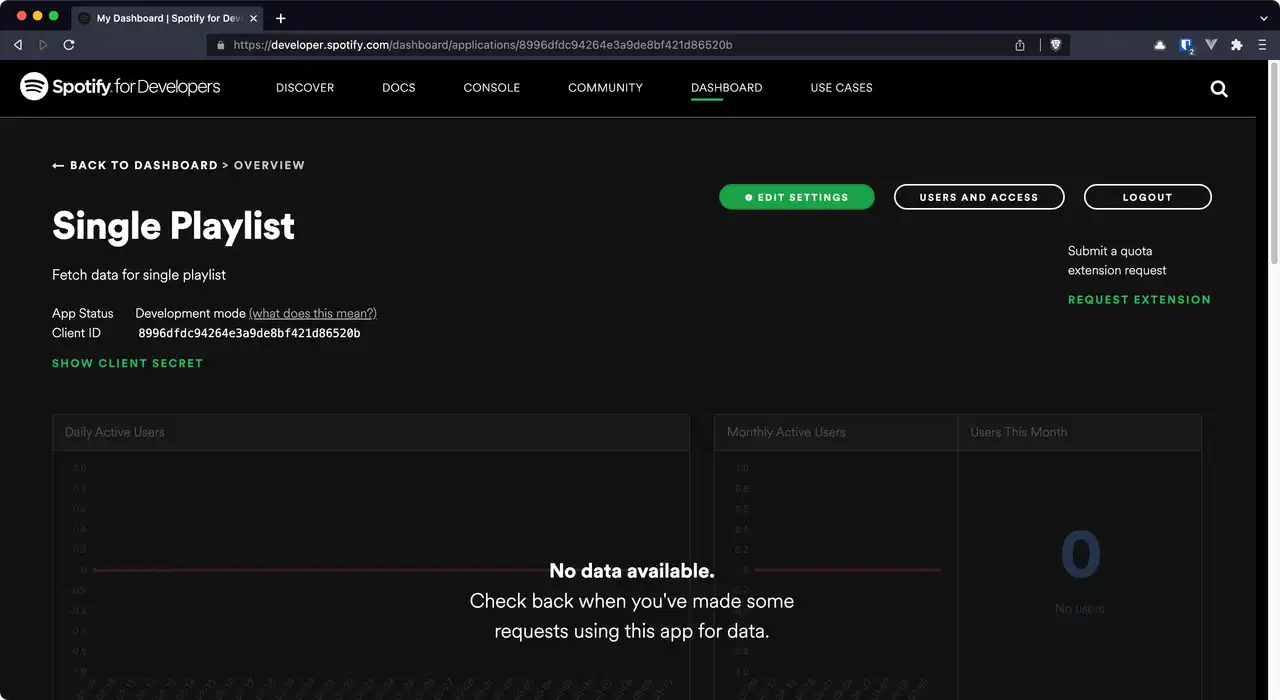
Press on the EDIT SETTINGS button. It should open a modal containing your application’s settings.
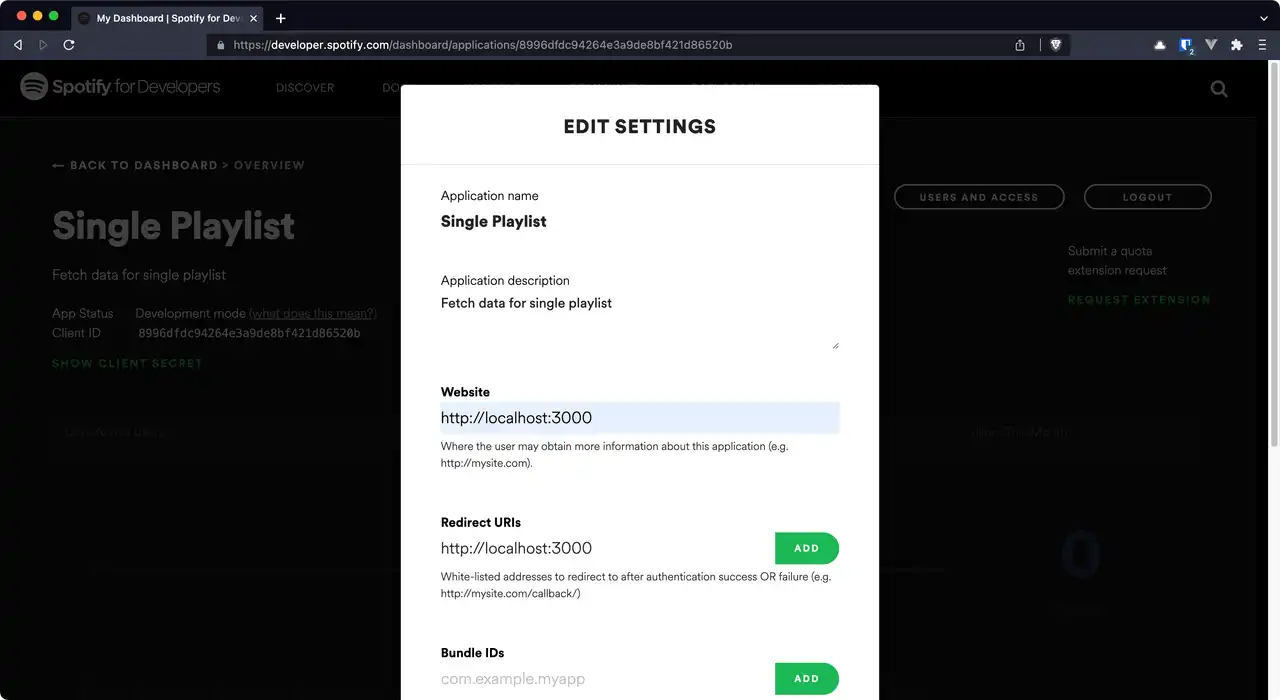
Fill out fields, Website and Redirect URIs.
Note
In the Redirect URIs field, be sure to press the ADD button after adding your URI string otherwise it will not save.
Finally, press the SAVE button to confirm all settings.
Grab the Client ID, Client Secret, and Scopes
Client ID and Client Secret
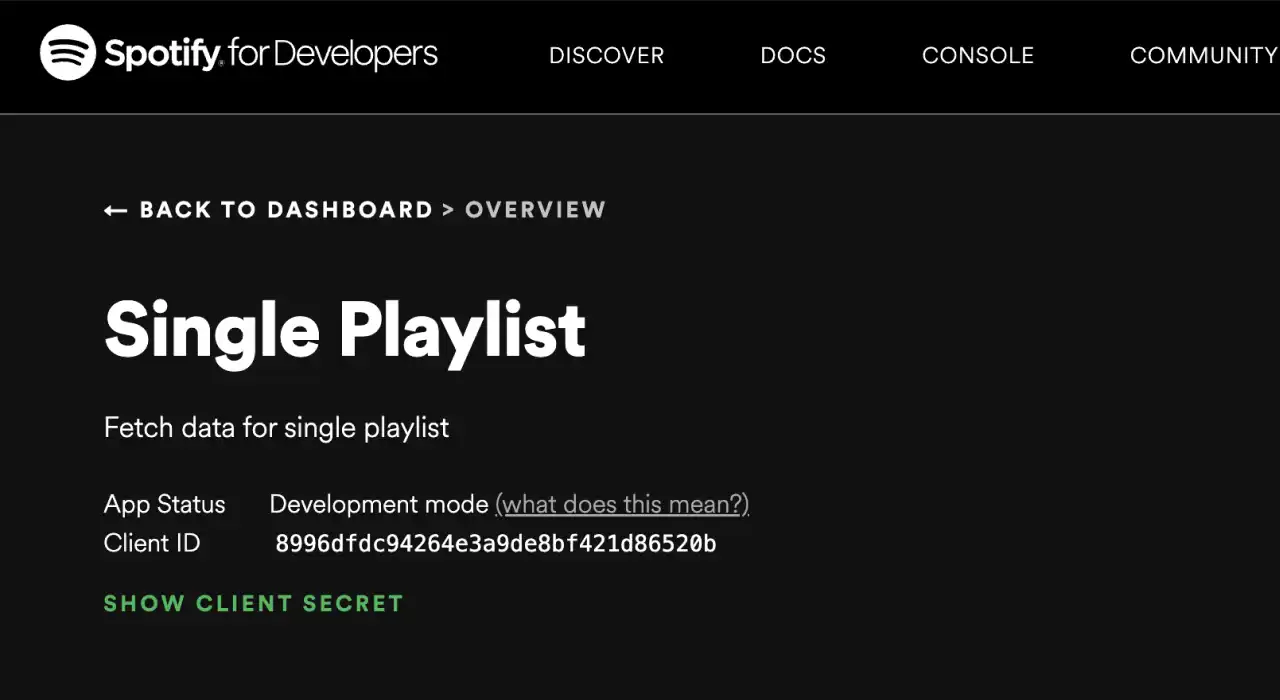
Directly from the app’s overview page, copy the CLIENT_ID and CLIENT_SECRET in order to construct an Authorization Token that will be used later on in the process.
Scopes
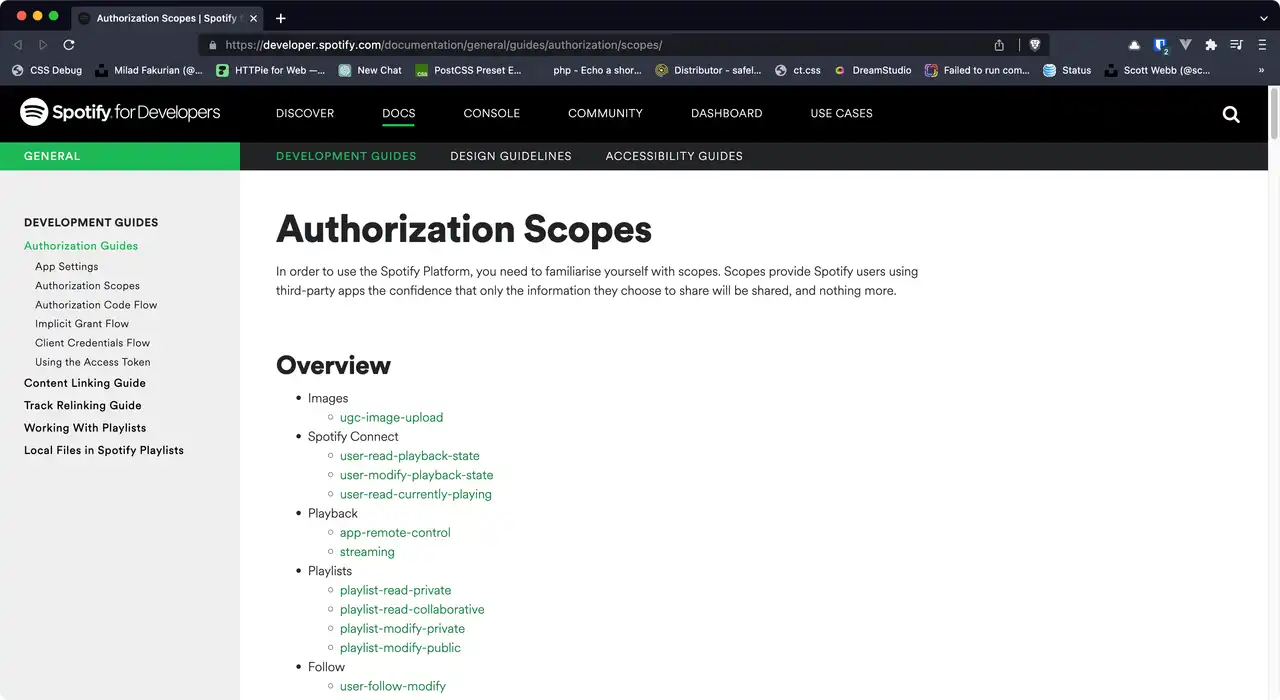
Next, grab any SCOPES required for the project.
More info: Authorization Scopes
For example, to get your own playlists, playlist-read-private will be required.
More info: Get Current User’s Playlists
Obtain the Refresh Token
Merge the App Clients
This step will be unofficially known as generating the APP_CLIENTS token.
In your CLI, combine the CLIENT_ID and CLIENT_SECRET and generate them together as a base64 string.
Model example:
echo -n CLIENT_ID:CLIENT_SECRET | base64Literal example:
echo -n '8996dfdc94264e3a9de8bf421d86520b:9e6bc0977a1c4b17974e6c4c16d14c71' | base64Result example:
ODk5NmRmZGM5NDI2NGUzYTlkZThiZjQyMWQ4NjUyMGI6OWU2YmMwOTc3YTFjNGIxNzk3NGU2YzRjMTZkMTRjNzE=Construct the URL for the Access Token
Model example:
https://accounts.spotify.com/authorize?client_id=CLIENT_ID&response_type=code&redirect_uri=REDIRECT_URI&scope=SCOPEReplace variables, shown in UPPERCASE, with your own.
Literal example:
https://accounts.spotify.com/authorize?client_id=8996dfdc94264e3a9de8bf421d86520b&response_type=code&redirect_uri=http://localhost:3000&scope=playlist-read-privateI found it unnecessary to encode the REDIRECT_URI beforehand when pasting it into the browser.
Wait!
After this point, you’ll have only 3600 seconds to complete the remaining steps after claiming the ACCESS_TOKEN because it will expire. When that occurs, you’ll have to start the process over again.
Paste the constructed URL into the browser, press ENTER/RETURN.
Upon success, a generated query string will show up within the brower’s URL field.
Result example:
http://localhost:3000/?code=AQCj0xjBvtw-aRCA8ymEI79T9MtmMUJri702U9m6Fd8JiX7wBLdvyYttz62mU97a1YEs9QoNdZiwL-viJnt5Ab5RAneWWTUz96Sa55QYXSygFGE3eA_NGUf1MQ-tP06atVm9uKX2GNA_DkZsAb1vGWeBp_6CkndC4ZTRLdgEcAZm3UGsO0Xk1LN8y63CBYDLThe random character string after REDIRECT_URI/?code= is your ACCESS_TOKEN. You’ll need this later to obtain your Refresh Token.
Retrieve the Refresh Token
For this next part, you’ll need the APP_CLIENTS result from earlier, plus the ACCESS_TOKEN, and REDIRECT_URI. Set up and run the following command in the CLI.
Model example:
curl -H "Authorization: Basic APP_CLIENTS" -d grant_type=authorization_code -d code=ACCESS_CODE -d redirect_uri=REDIRECT_URI https://accounts.spotify.com/api/tokenReplace variables, shown in UPPERCASE, with your own.
Literal example:
curl -H "Authorization: Basic ODk5NmRmZGM5NDI2NGUzYTlkZThiZjQyMWQ4NjUyMGI6OWU2YmMwOTc3YTFjNGIxNzk3NGU2YzRjMTZkMTRjNzE=" -d grant_type=authorization_code -d code=AQCj0xjBvtw-aRCA8ymEI79T9MtmMUJri702U9m6Fd8JiX7wBLdvyYttz62mU97a1YEs9QoNdZiwL-viJnt5Ab5RAneWWTUz96Sa55QYXSygFGE3eA_NGUf1MQ-tP06atVm9uKX2GNA_DkZsAb1vGWeBp_6CkndC4ZTRLdgEcAZm3UGsO0Xk1LN8y63CBYDL -d redirect_uri=http://localhost:3000 https://accounts.spotify.com/api/tokenAfter running the command, you should see a JSON object with a refresh_token key.
Result example:
{
  "access_token":"AQCj0xjBvtw-aRCA8ymEI79T9MtmMUJri702U9m6Fd8JiX7wBLdvyYttz62mU97a1YEs9QoNdZiwL-viJnt5Ab5RAneWWTUz96Sa55QYXSygFGE3eA_NGUf1MQ-tP06atVm9uKX2GNA_DkZsAb1vGWeBp_6CkndC4ZTRLdgEcAZm3UGsO0Xk1LN8y63CBYDL",
  "token_type":"Bearer",
  "expires_in":3600,
  "refresh_token":"AQA-MBfdRwjskuZ1mRg-8Q_47Mgyc2mvJ7tor_I0dP51CbpxqYHGGEWA53ob5Spz9BM1UG3uSHlYGqW3UdjshprPnL7ltMBmGzxjpNGuWJaBSHT8Hsm2U9IP-_-fA6lZrRc",
  "scope":"playlist-read-private"
}
Add the value of the refresh_token to your REFRESH_TOKEN variable.
Congratulations! Now, time to fetch some tunes….
More Info
Much of this guide was taken from James Reagan.
Watch the video: Server-render your Spotify data in a JavaScript application
Article Credits
Photo by Fausto Sandoval on Unsplash